
Hey, I write this blog in French, my native language. AI was used to translate this.
I proofread it but please let me know if you spot anything off. Cheers!
Over the years, first on Gamemaker then on Godot, I’ve built quite a few games that needed trajectory prediction. For me it’s all about balls: golf, minigolf, pool. But there are plenty of other uses: some of the weapons in Worms, the launch in Angry Birds, or any pachinko like Peggle.
What I love about game dev is that right from the first second of a mini golf prototype, on every tiny detail, you can fall into a rabbit hole of improvements, optimizations, and added juice.
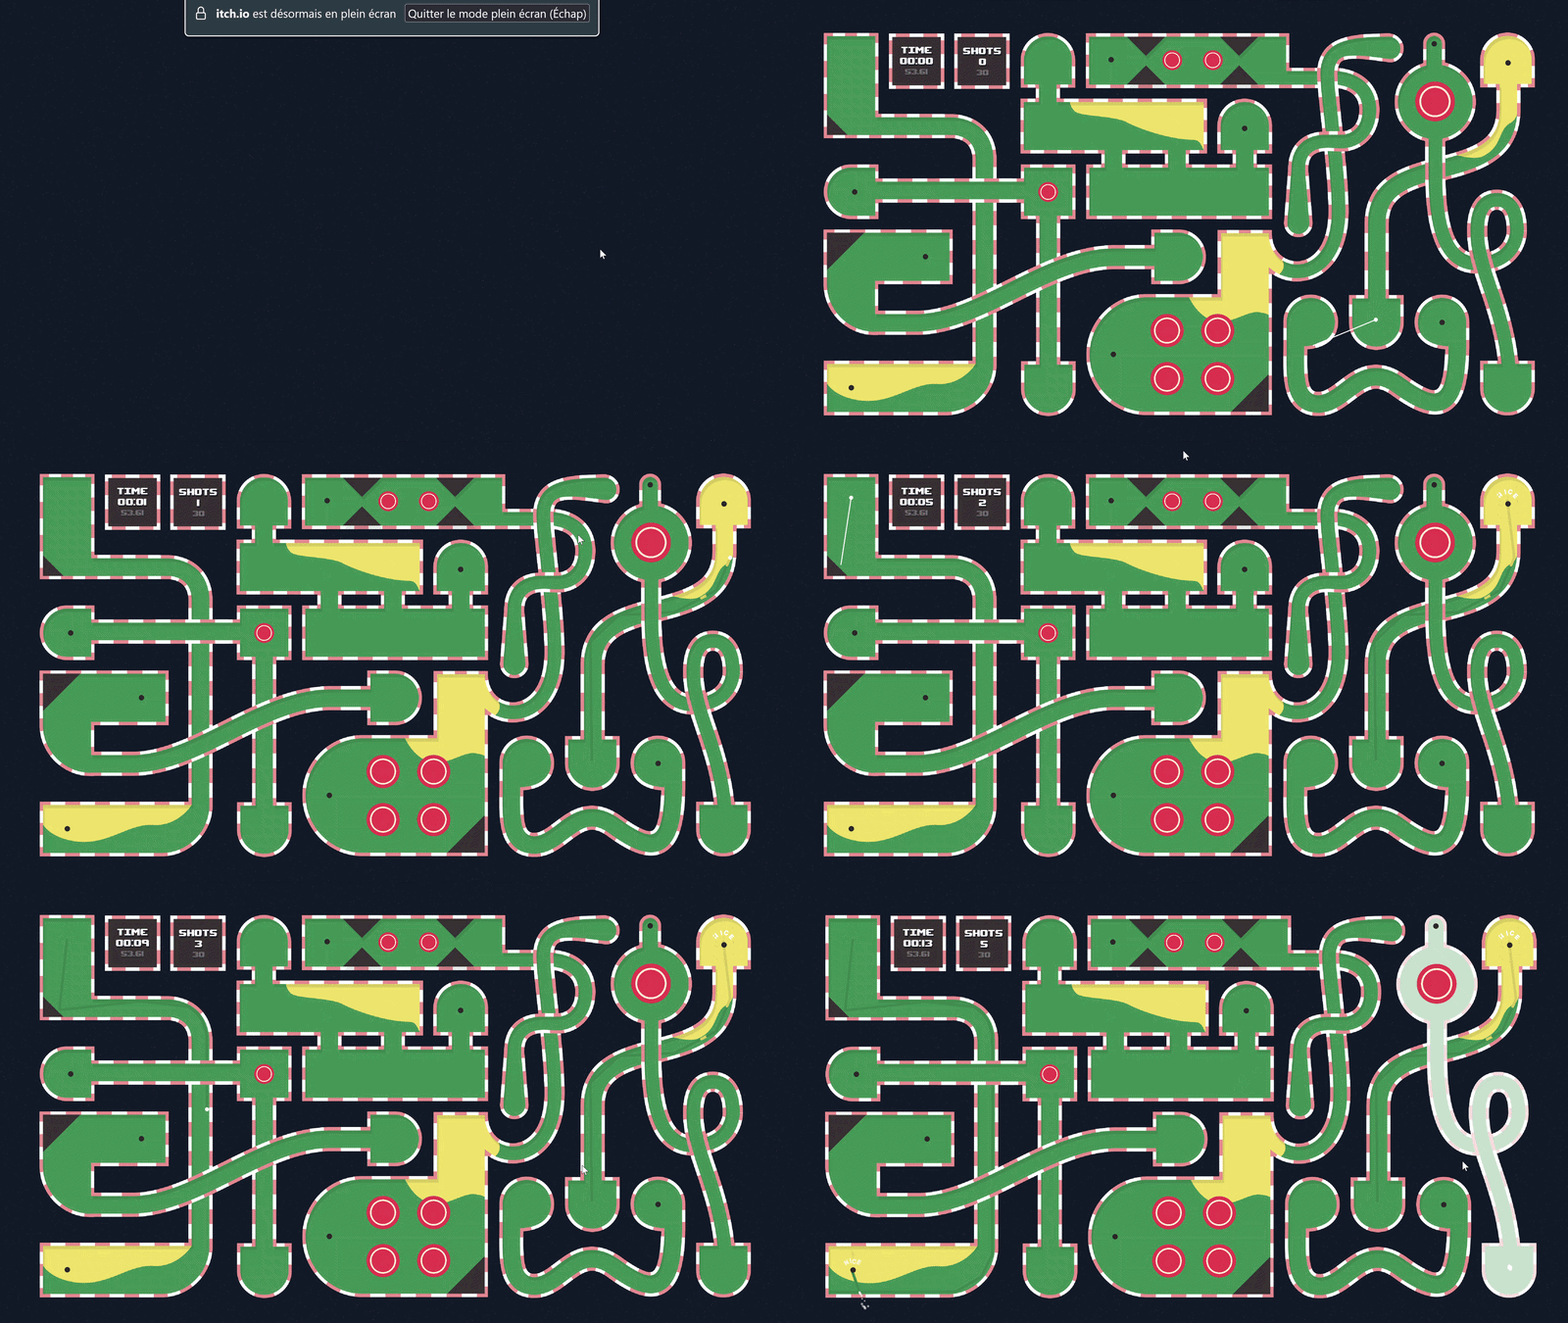
In Golf madness (one of those games I never finished), I went with the most basic prediction. A line. To know where the ball will go when you release the click, it’s simple, it works, and I’ve already “wasted” plenty of time on games with less than that.
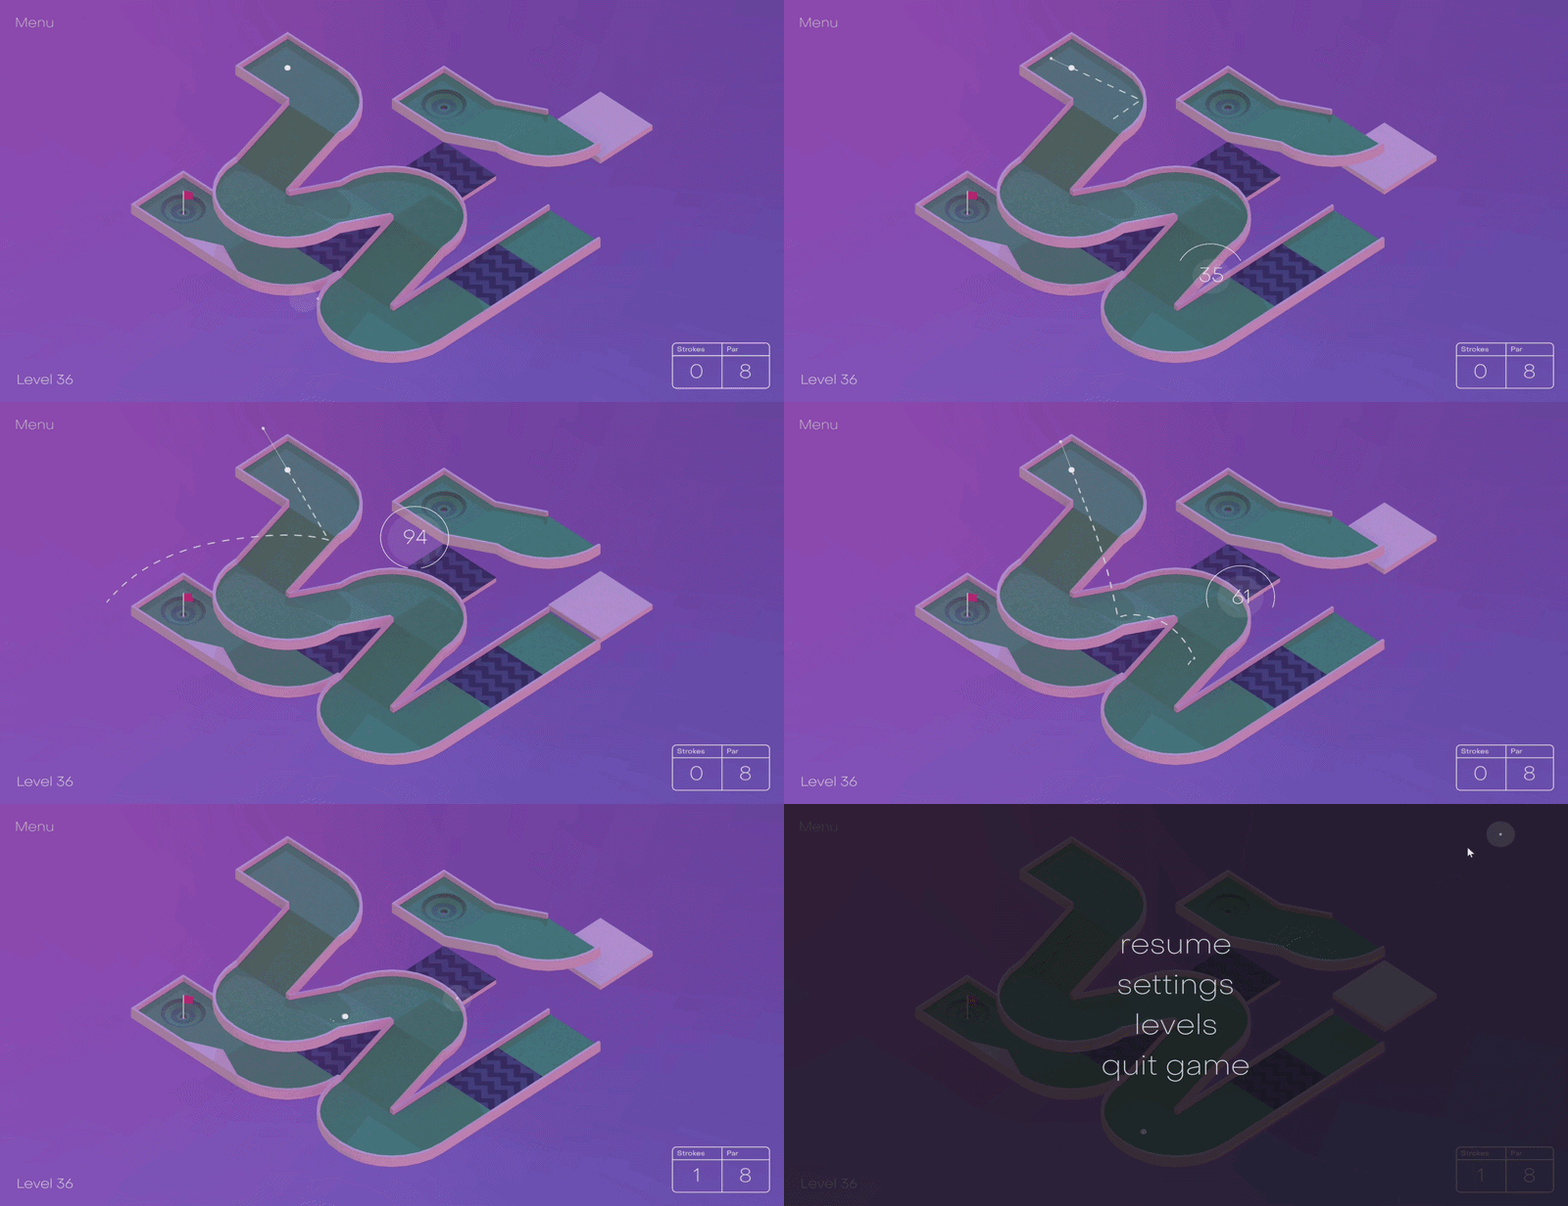
A bit more complex in 3D, in Chilly Greens, I wanted a faithful prediction of the trajectory. Almost more as a challenge than to improve the game. And in the end, the gameplay ends up feeling almost more like a puzzle game than a golf game.
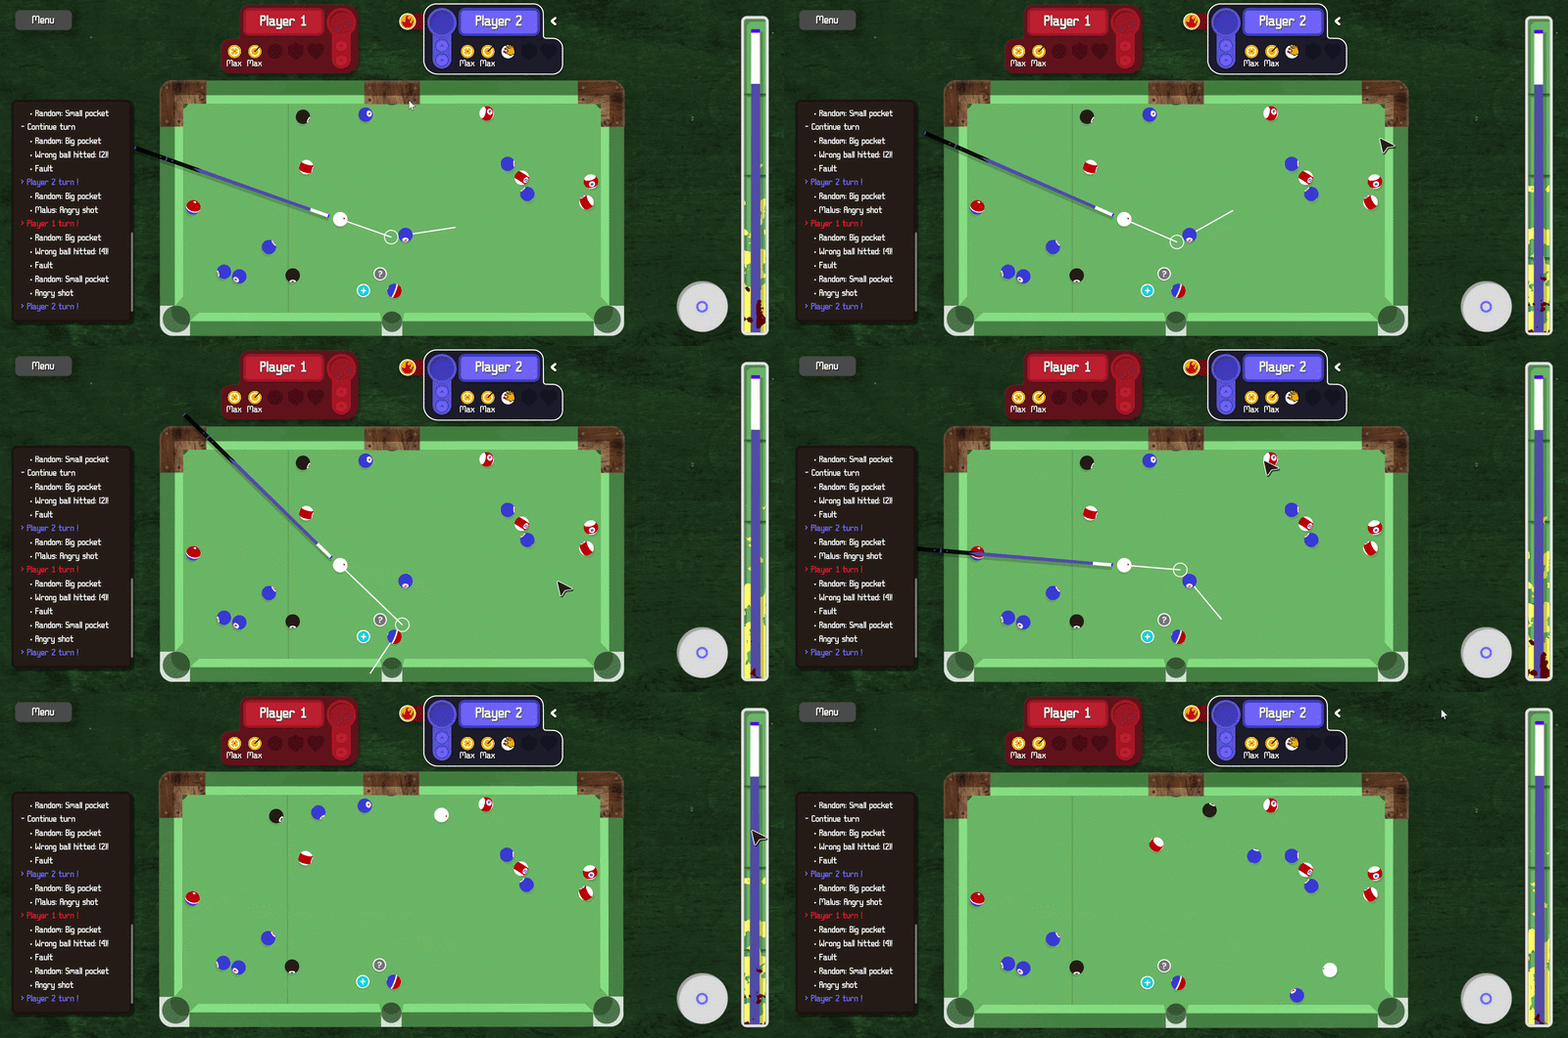
Finally in Poooooool, back to 2D, but this time with a mix of mathematical prediction and iterations.
Golf madness, or the basics.
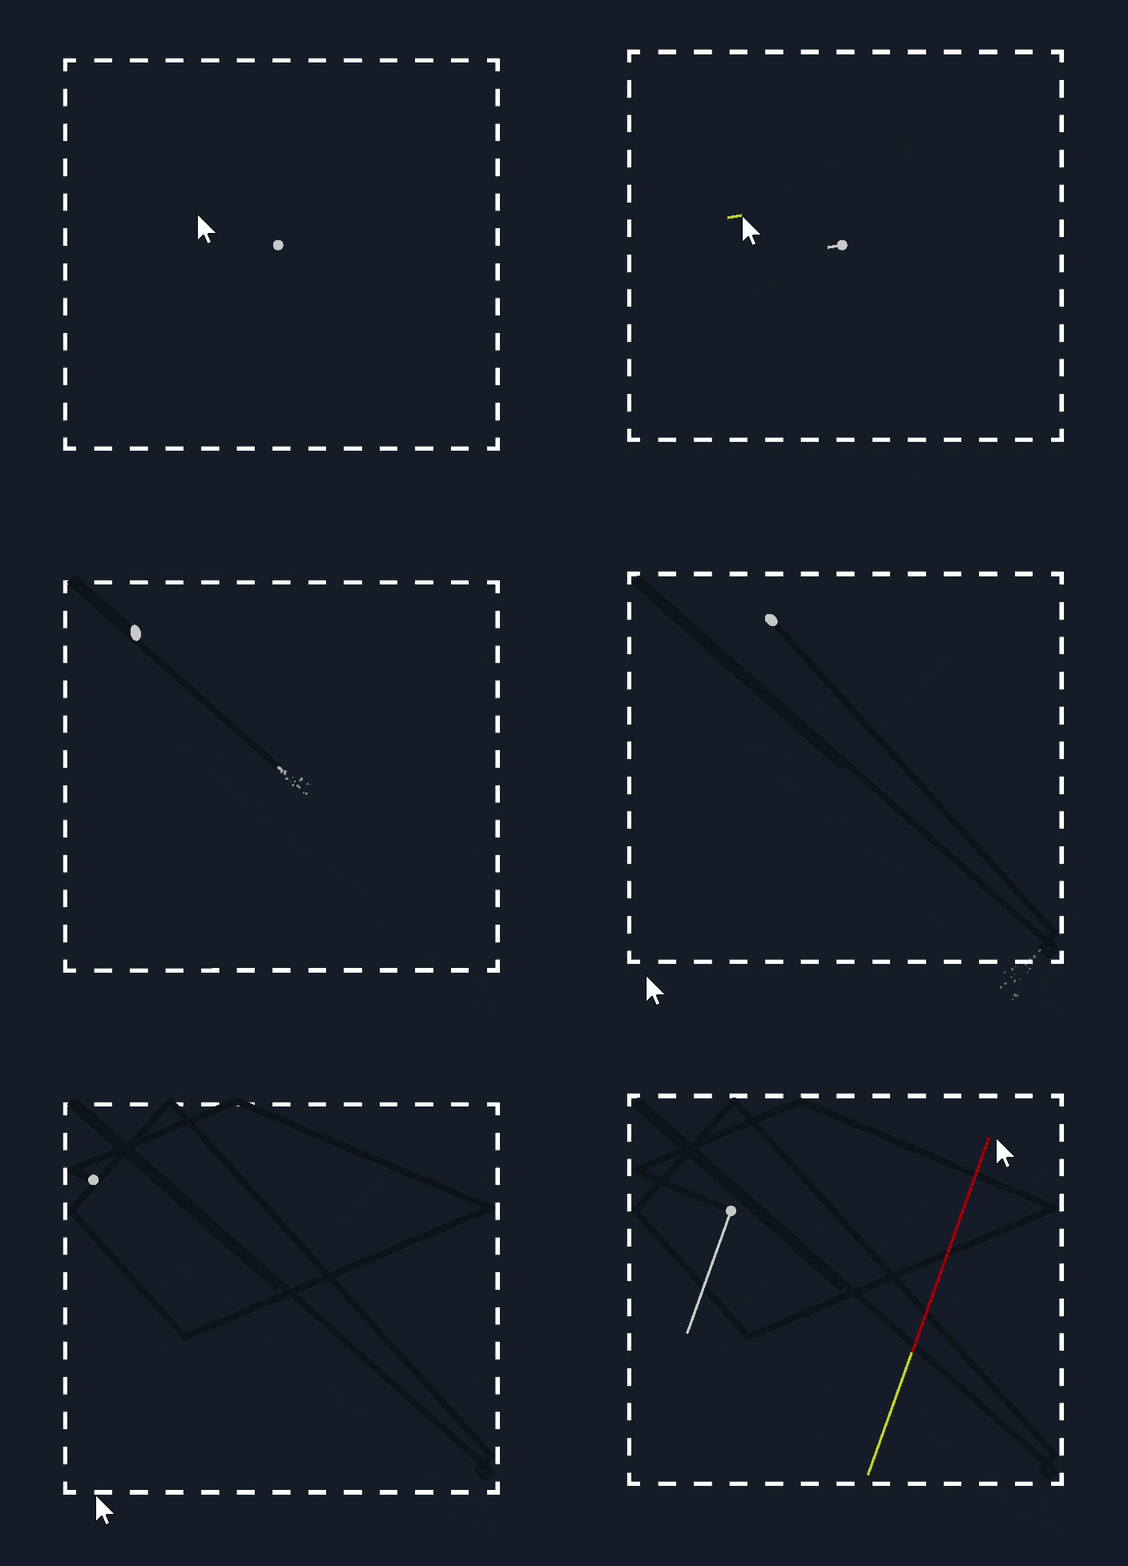
For Golf madness, in the intro, I mentioned a line. But really, it’s a vector, and that’s more convenient since it gives you the direction and the power directly.
When the user mouse_down, I save the mouse position, then on every frame I look at the mouse position and get the vector between those two points.
With that, all I have to do is draw it starting from the ball. We already have the right direction and the right size. And voilà. Here, I just added a representation of the drag and a cap on the shot power.
Chilly Greens and perfect prediction.
For Chilly Greens, my first approach was to try doing it mathematically, but I never managed to make it reliable. I always had offsets caused by friction, or a general lack of precision.
Luckily, I discovered that the function I was using for the ball physics, move_and_collide, had a test_only parameter.
In the documentation we can read:
If test_only is true, the body does not move but the would-be collision information is given.
Exactly what I needed. With that, I can simulate a shot, grab the ball position on every frame, and visually render each step.
An instant success:
Okay, I maybe went through a few steps to make it viable and pleasant. But I really like the result.
The first thing to solve was the bounces. When the ball goes fast, there can be big distances between two frames. If there’s a bounce between them, I can’t just draw a line between the two positions. We get around it by adding a few extra key positions to the path, like the position of each collision.
The second problem is that when you grab the position on every frame, the distance between two positions depends on the ball’s speed. So once I’ve got the overall trajectory, I cut it back up into equal parts to get a nicer looking prediction.
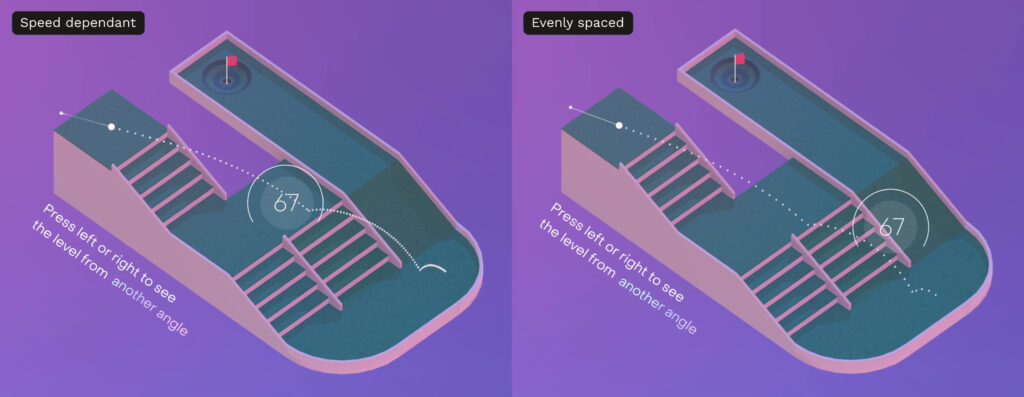
And there we go, for the final result:

Poooooool, or the power of Pythagoras.
For Poooooool it was another story. For the balls, I use the Godot built-in physics system, so without move_and_collide, I had to find another solution.
Simple iteration.
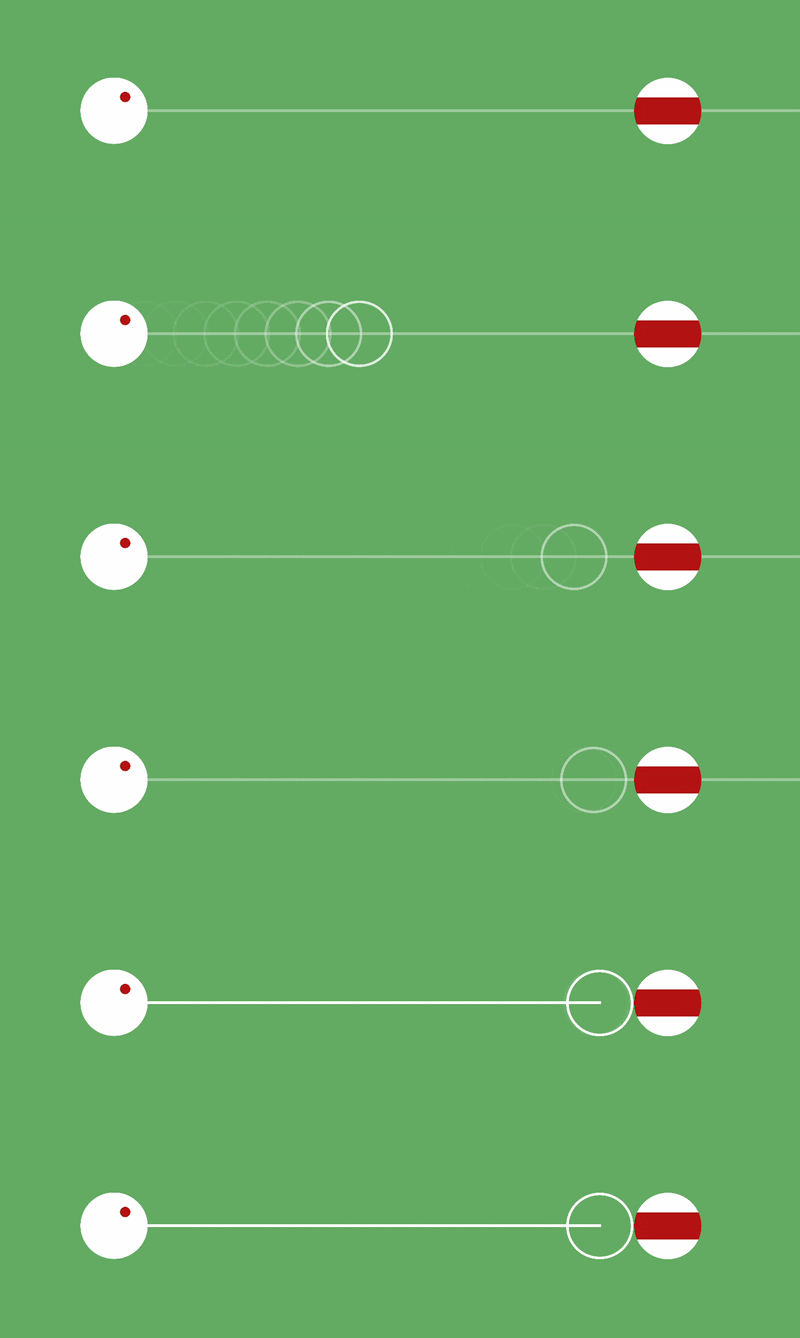
I know which direction the cue ball is going. So that part’s easy. A simple solution would be to move by a step of 1 pixel in that direction. I check if there’s contact. No contact? I keep going. And we start over for 100, 200, 500 iterations. If I find a contact, I stop the function, step back one iteration and get the position just before the contact. Perfect, you might say !
But we can try to optimize a bit. We could increase the starting step. 100px for example, it’d be faster even if we’d lose some precision.
The ideal would be to start with big steps. Once we’ve got the contact, we start again from the last position before the contact. We divide the step size by 10 and start over from that position to find the contact again. Aaand one last time dividing by 10 again if you want to be super precise. And honestly, to the eye, I can’t tell the difference anymore.
Just with this optimization, in the example below, we go from 400 steps down to 24 steps.
All that’s left is to do this on every frame and we’re good. Alright, it might not be the smartest or the prettiest solution, but it works and I still use it in some specific cases today.
But still, I really wanted to find a mathematical solution to this problem.
Back to 8th grade with Pythagoras
First, we need to find which balls the cue ball is going to collide with. To do that, we can do a vector projection of each ball onto the mat, and check if the segment between the projection and the ball’s center is smaller than the cue ball’s radius + the ball’s radius. Since both radii are identical, we can simplify it to the diameter (2r).
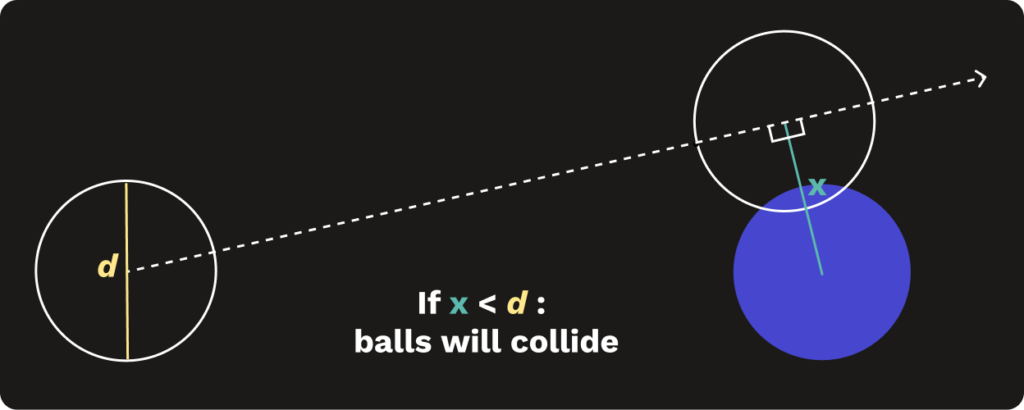
We found a collision, now we’re looking for the exact spot of the collision. To do that, we go back a little until the balls aren’t touching anymore. And all that’s left is to figure out how to calculate that pullback (in red on the image).
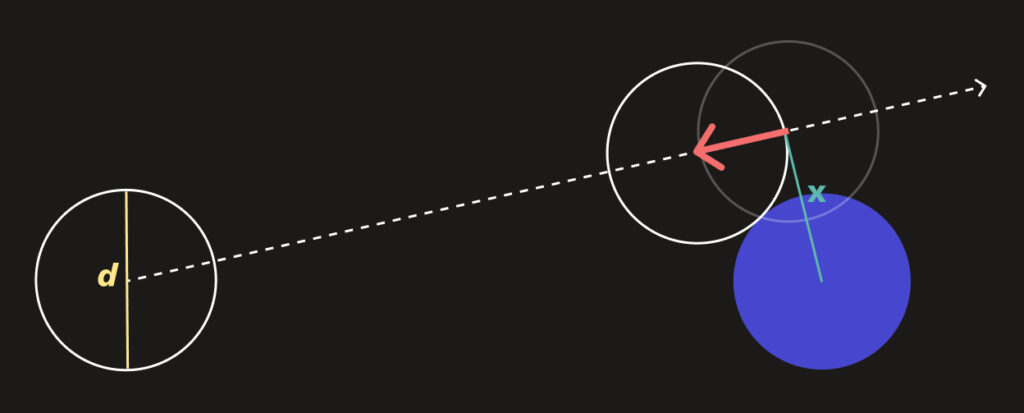
And luckily (and thanks to Pythagoras), it’s pretty simple. We already know the length of two of the sides and we’re in a right triangle thanks to the vector projection. We know x: the distance between the ball’s center and the vector projection, and we know the desired distance between the two centers since that’s d. All that’s left is to apply the Pythagorean theorem to find y.
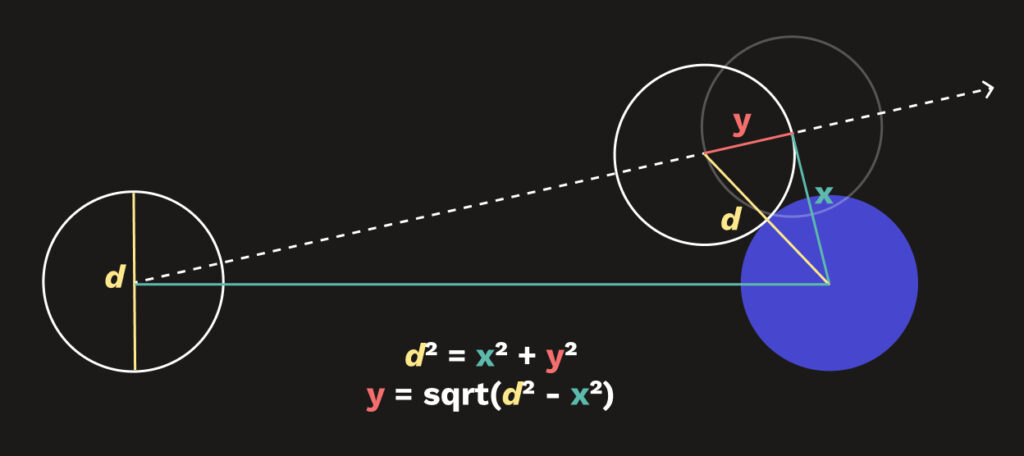
Just with this calculation, no more need for iterations to predict the contacts on the table.
Conclusion
In the end, each solution shown here can work perfectly well depending on the type of game and the result you’re after.
For example, people both loved and hated the perfect prediction in Chilly Greens, some for how easy the game became with it, others for its lack of difficulty. And for Poooooool, whether it was iteration or a mathematical calculation, the prediction worked perfectly without any lag. For Golf madness, the super simple prediction makes the game more chaotic and fun.
You just have to try as hard as you can to go along with the game and the gamefeel you’re trying to create. On my end, it was interesting to make so many different versions, convinced every time that the new one was the best.
If you want to try the demo versions of the games mentioned:
Chilly greens on itch
Poooooool on itch